How To Arrange Funds And Locations In The Admin Portal
We'll walk you through how to change the display order of funds, locations, and relate funds to locations.
Steps to Arrange Funds Using The My Well Giving Platform Web Version:
1. Sign in to your My Well account and navigate to the Admin Portal.
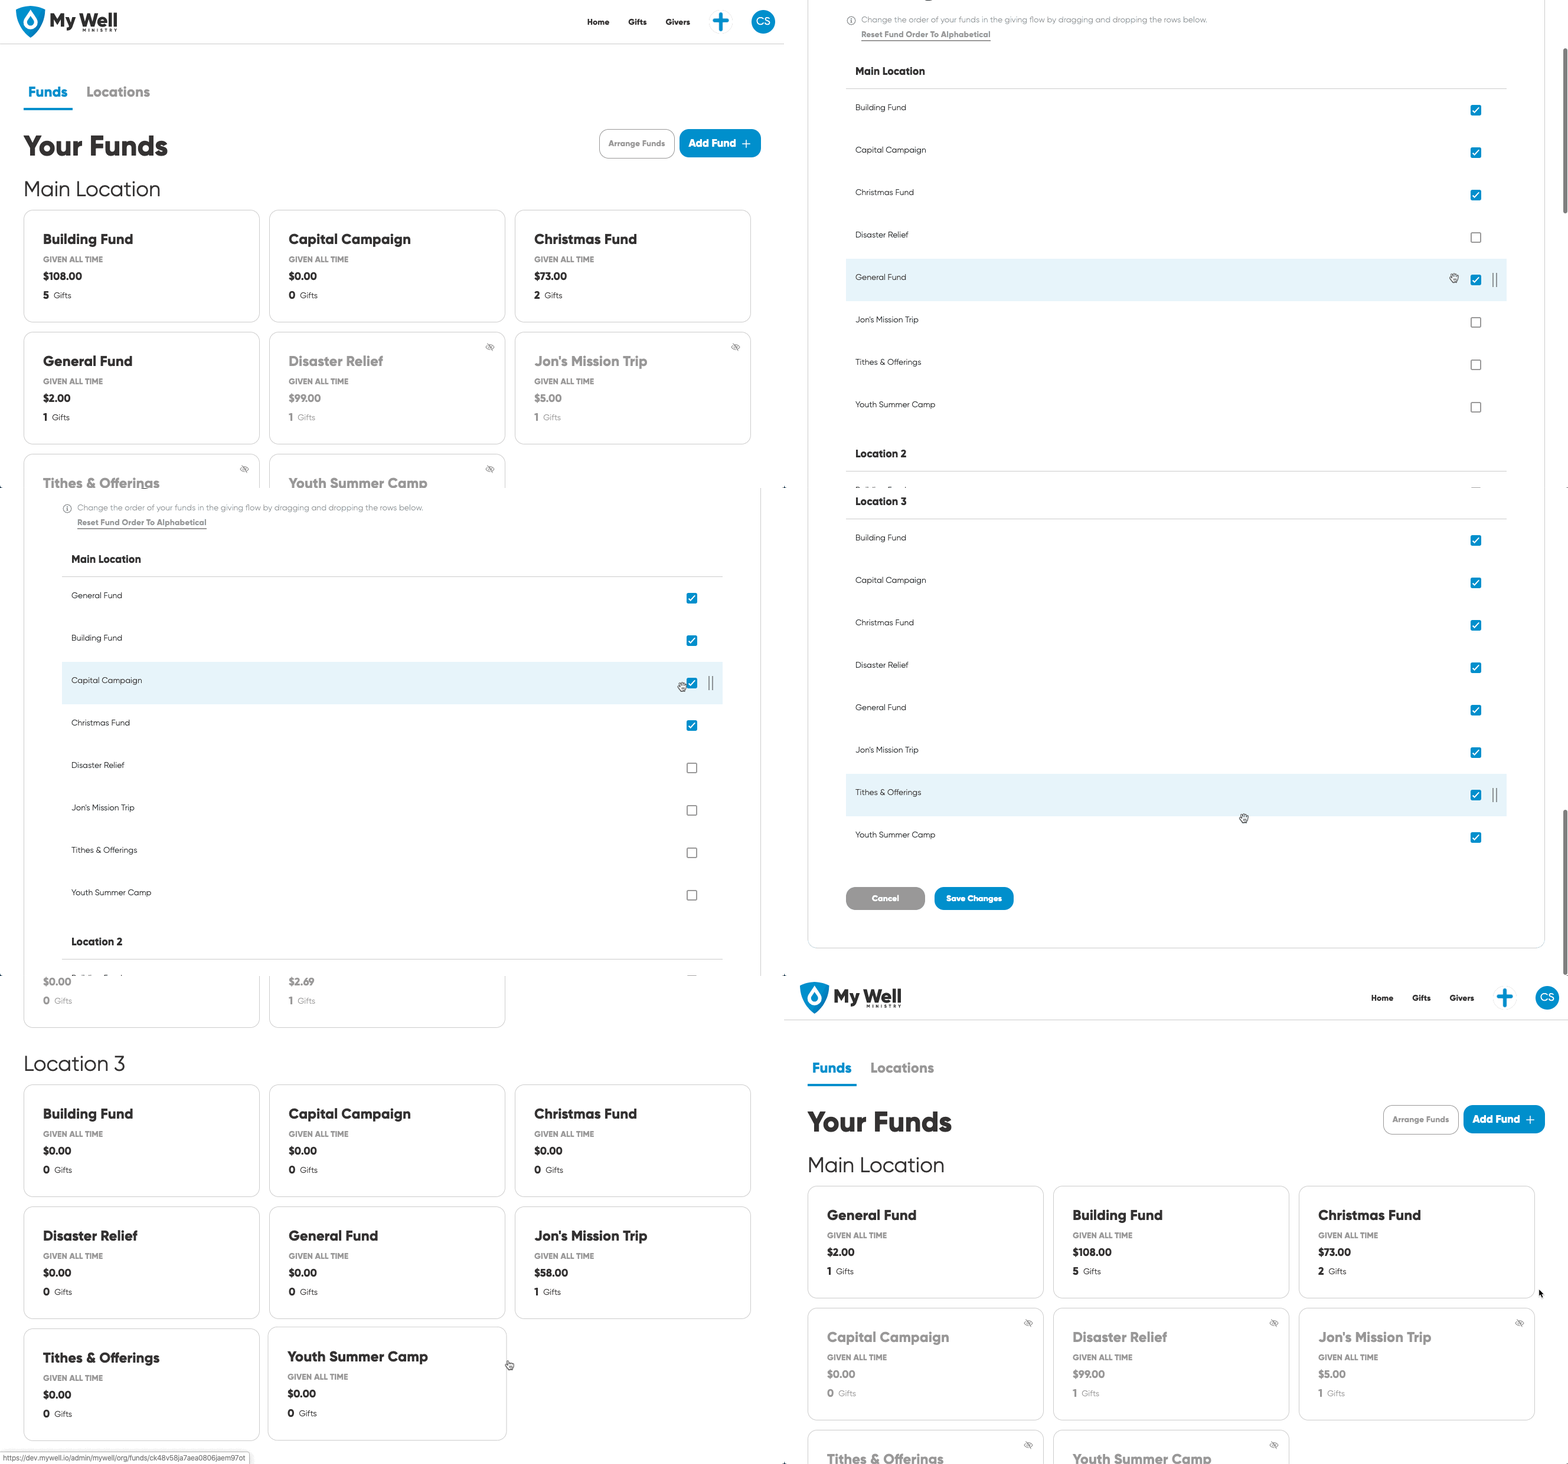
2. Select your organization's logo in the top right corner and then select Funds.
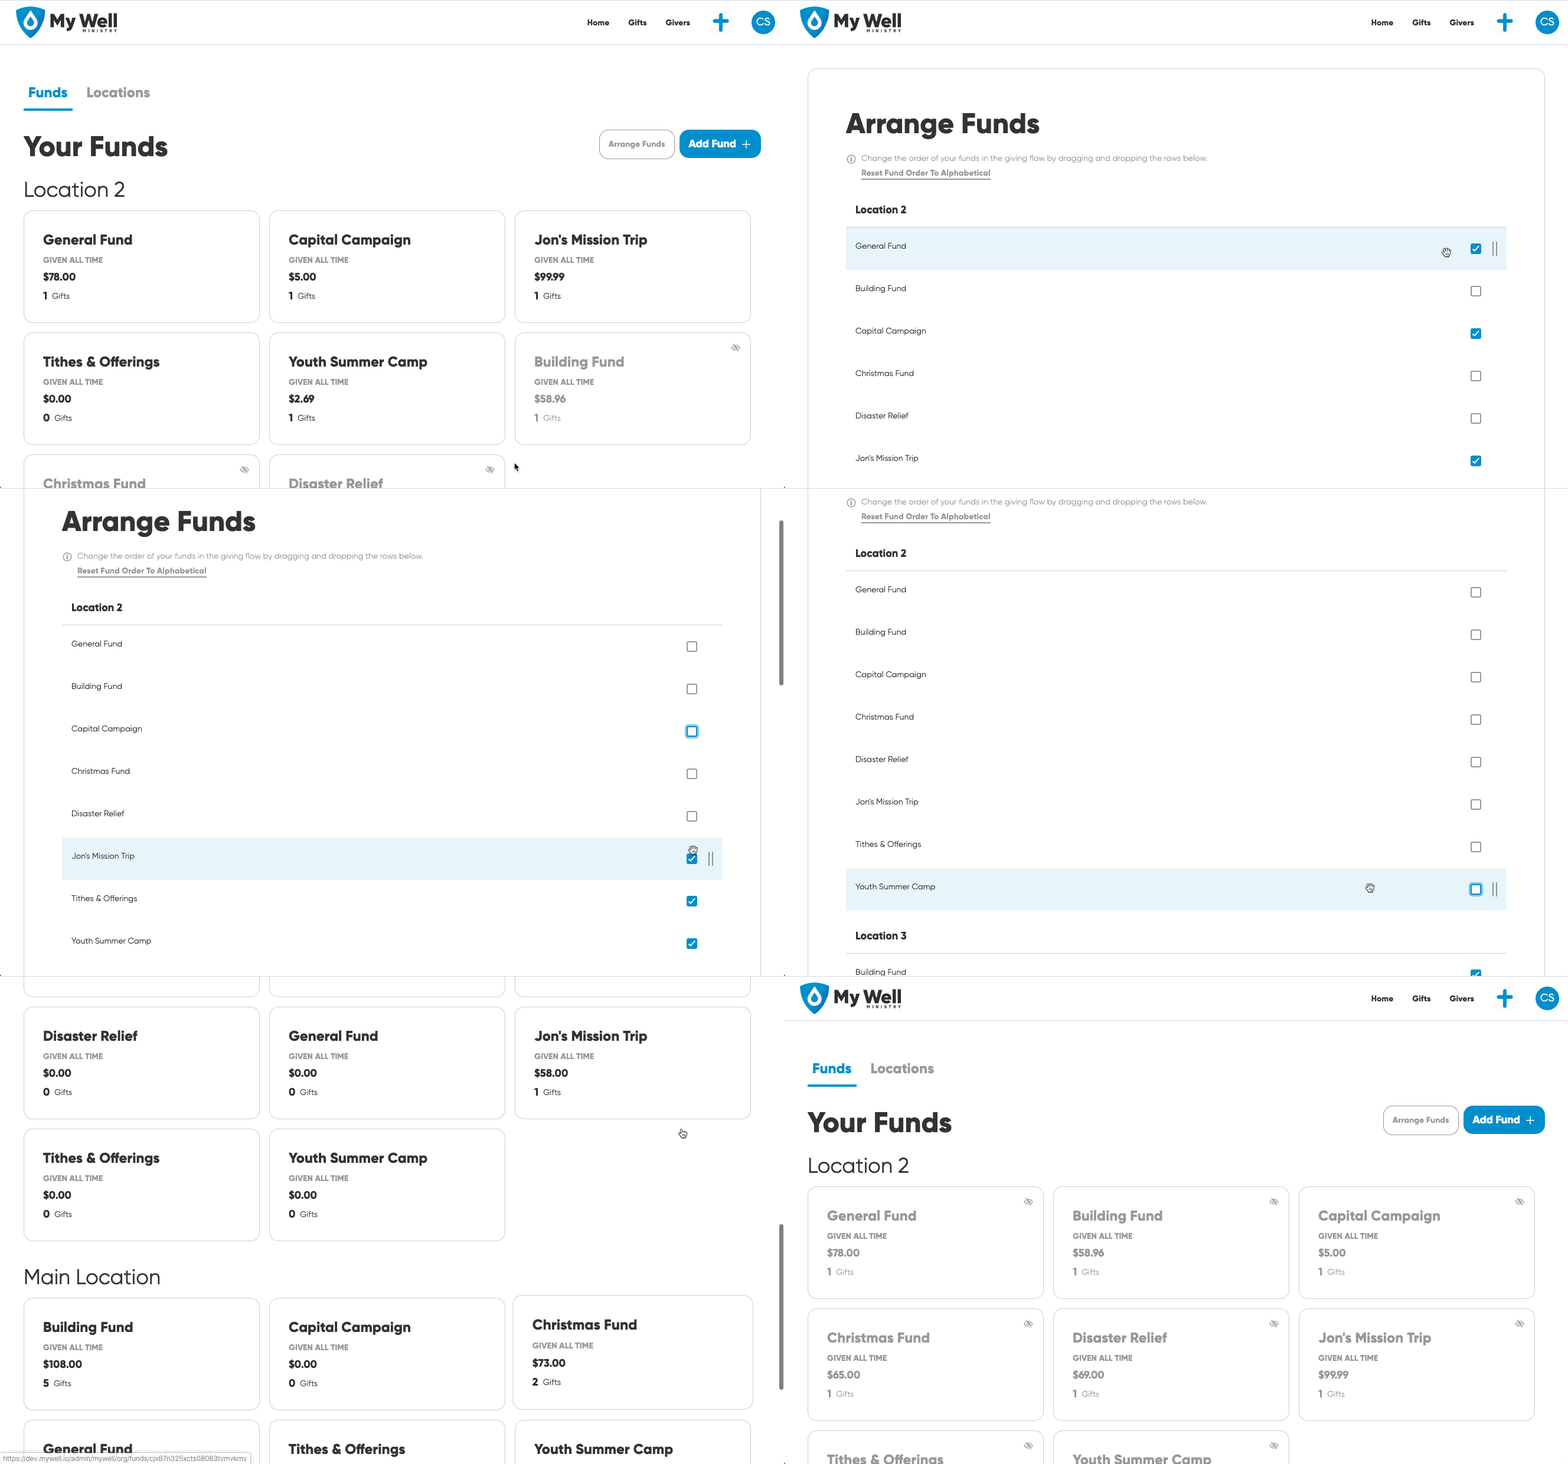
3. Select Arrange Funds.
4. To move funds, drag them up or down the list. To hide a fund, check the box on the right.
5. If you have multiple locations, you will be able to arrange the funds for all locations on this same screen. Simply scroll down to the other locations.
6. Select Save Changes at the bottom of the page when you are doing arranging funds.


Steps To Arrange Locations Using The My Well Giving Platform Web Version:
1. Sign in to your My Well account and navigate to the Admin Portal.
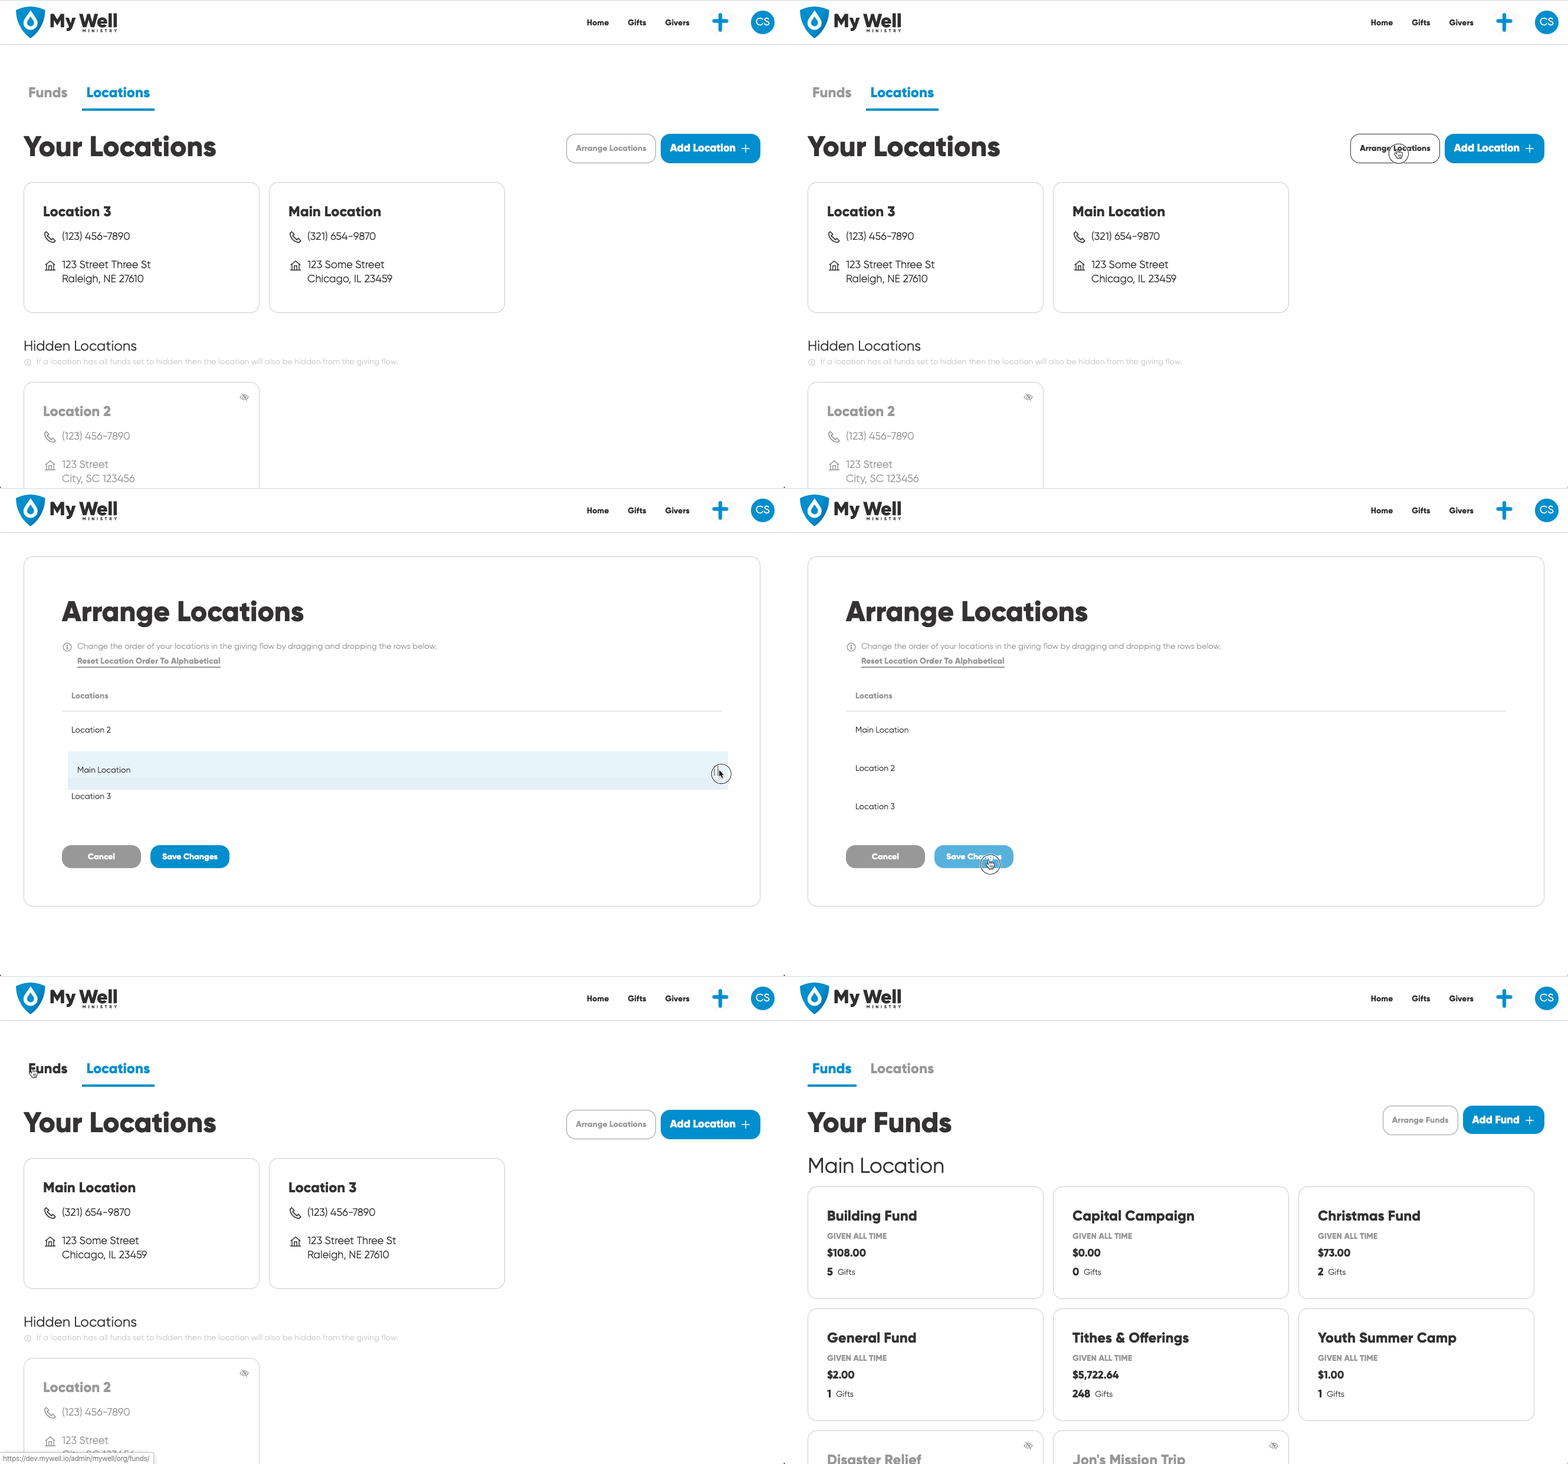
2. Select your organization's logo in the top right corner and then select Locations.
3. Select Arrange Locations.
4. To move locations, drag them up or down the list.
5. If you change your mind, you can select Reset Location Order To Alphabetical.
5. Select Save Changes at the bottom of the page when you are doing arranging locations.
Note: If givers have recurring schedules set up when you hide a fund, those gifts will continue to go into that fund even though it is no longer visible.
