We'll walk you through how to set up your integration into Rock RMS.
Steps To Set Up The Rock Integration:
1. Install the My Well plugin in Rock.
2. Connect your Rock instance in My Well.
3. Assign your funds in My Well to accounts/funds in Rock.
Steps To Install The My Well Plugin In Rock:
1. Go to the Rock shop.
2. In the giving/finance section, look for the My Well Ministry plugin.
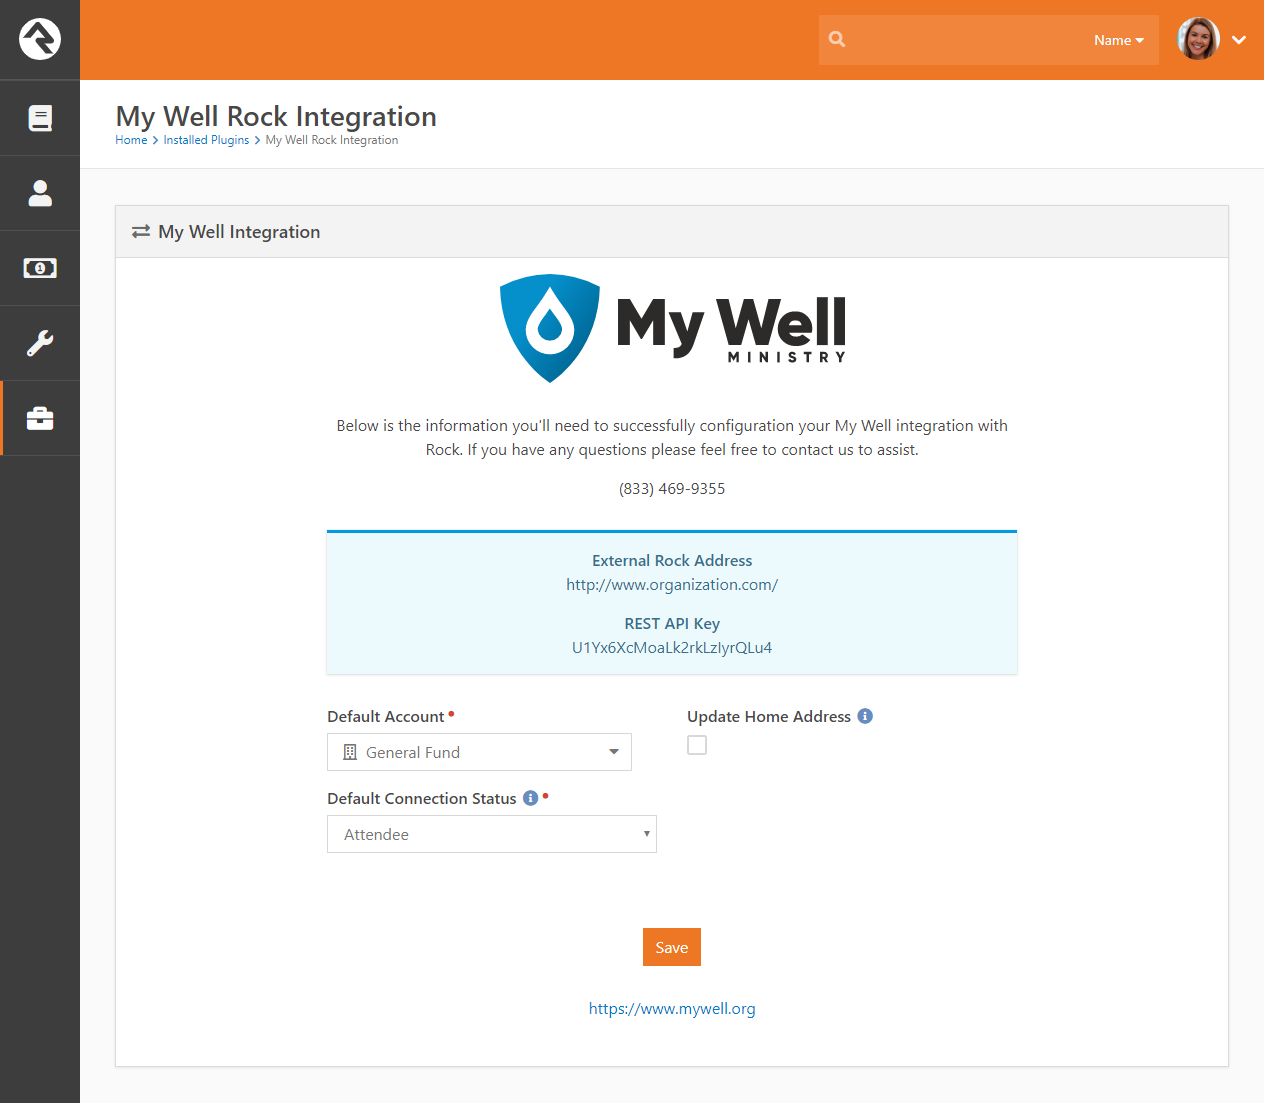
3. Once installed, confirm these default settings.
- Default Account: If a fund in My Well has not been explicitly linked to an account or fund in Rock then the Default Account is how gifts will be classified in Rock when they sync.
- Default Connection Status: When My Well syncs gifts to Rock, it will check if there is an existing person record within Rock with whom we can attribute the gift. If there is no existing person, then we will create a new person record in Rock with whatever the Default Connection Status is set to.
- Update Home Address: When a giver creates their account in My Well, they provide a home address. If they were to update their home address within the My Well platform, you can decide whether or not that should also sync and update their information within Rock.
Steps To Connect Your Rock Instance Using The My Well Ministry Web Version:
1. Sign in to your My Well account and navigate to the Admin Portal.
2. Select your organization's logo in the top right corner.
3. Select Integrations.
4. Select View & Edit under Rock RMS.

5. Select Create to add your details.
6. Enter the External Rock Address and REST API Key. Both of these can be found in the My Well plugin in your Rock account.

7. Select Save Changes.
Steps To Assign Funds:
1. Sign in to your My Well account and navigate to the Admin Portal.
2. Select your organization's logo in the top right corner.
3. Select Integrations.
4. Select View & Edit under Rock RMS.
5. Select View & Edit under Fund Sync.
6. On the left-side you will see each fund name in My Well, and on the right side will be a drop-down containing all the accounts/funds synced from your Rock instance.
7. Go through and assign each fund to the corresponding account in Rock.
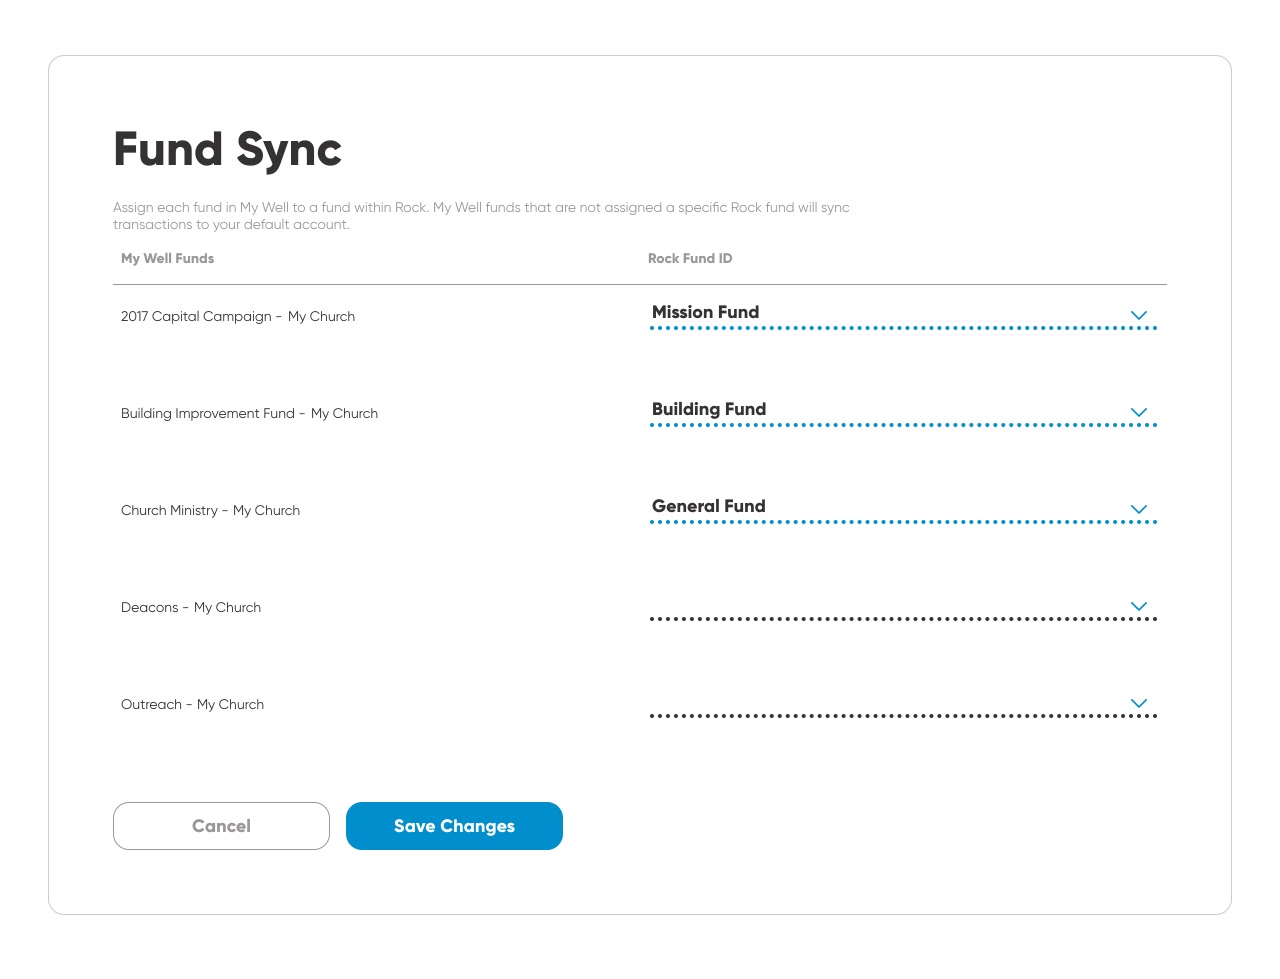
Note: If you have multiple locations, then each fund will have its own section, and every fund will have its location name appended to the fund name. You may be grouping all your funds within Rock regardless of location, or you may be separating them out based on the location. This data structure should give you the flexibility to accommodate either option.
Steps To Start Syncing Using The My Well Ministry Web Version:
1. Sign in to your My Well account and navigate to the Admin Portal.
2. Select your organization's logo in the top right corner.
3. Select Integrations.
4. Select View & Edit under Rock RMS.
5. Select Begin Syncing in the top right corner.

6. When a gift is created in My Well, the gift is immediately synced over to Rock with a status of pending. It will show up in the My Well pending gifts batch. Once a gift settles, the update is synced, and the gift will be moved to a settlement batch within Rock. Batches are grouped the same way in Rock as they are in the My Well platform, with separate batches for credit card, and ACH transactions.
Note: If you need any assistance setting up the Rock integration, you can use this link to book a meeting with our Technical Support Staff.